Wednesday, May 31, 2017

May all of your dreams come true Card

Happy Wednesday! I've been playing with some of the beautiful new patterned paper just released from ModaScrap, which you can purchase in the Elizabeth Craft Designs Online Store. While playing with the patterned paper, I created this adorable card that features some of the new patterned paper from ModaScrap as well as the Hot Air Ballon Die from Joset Designs and a few other dies from ModaScrap and Els van de Burgt Studios. I have a tutorial below for you so that you can recreate my cute May all of your dreams come true Card at home. 


To start, you'll need to die cut the large Hot Air Balloon out of White Soft Finish Cardstock. Once the ballon has been cut out, apply Weathered Wood Distress Ink with a blending tool over top of the top portion of the ballon. Using a blending tool and Vintage Photo Distress Ink, blend the ink over the bottom portion of the ballon. 


Die cut the smaller Hot Air Balloon out of White Soft Finish Cardstock. With the hot air ballon cut out, apply Tattered Rose Distress Ink with a blending tool over top of the top portion of the ballon. Using a blending tool and Vintage Photo Distress Ink, blend the ink over the bottom portion of the ballon. 


Die cut the three stars out of White Soft Finish Cardstock. Using a Blending Tool and Fossilized Amber Distress Ink, blend the ink over top of all three stars.


Die cut both the large and small sets of pointy pieces for the basket of each hot air balloons out of White Soft Finish Cardstock. Using a Blending Tool and Vintage Photo Distress Ink, blend the ink over top of all six pointy pieces.


Die cut the heart out of White Soft Finish Cardstock. Using a Blending Tool and Tattered Rose Distress Ink, blend the ink over top of the heart.


From the blue polka dot patterned paper, die cut the pennant banner, as well as the large and small scallop pieces for the large hot air balloon.


While you still have the blue polka dot paper and pennant banner out, die cut another pennant border out of the blue polka dot paper.


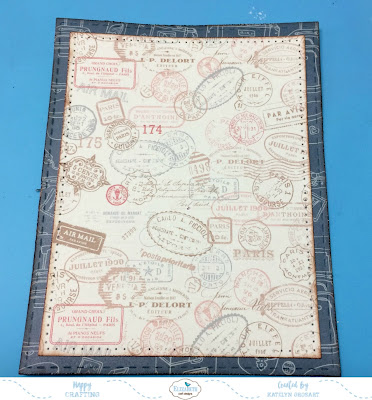
Using the 1 1/4" Stitched Fishtail Banner, die cut the banner from the back side of the front fly sheet from the Viaggi Vintage 12x12 Patterned Paper Pack. Cut the banner down to 3 5/8". Apply Jet Black Archival Ink to the May All Your Dreams Come True sentiment stamp and stamp onto the banner. After the sentiment has been stamped, ink the edges of the banner using Vintage Photo Distress Ink and a Blending Tool.


Using the 3 1/2" Stitched Rectangle die, die cut the stitched rectangle from the back side of the front fly sheet of the Viaggi Vintage 12x12 Patterned Paper Pack. Ink the edges of the stitched rectangle using Vintage Photo Distress Ink and a Blending Tool.


Using the 4" Stitched Rectangle die, die cut the stitched rectangle from a piece of patterned out of the Viaggi Vintage 12x12 Patterned Paper Pack. Ink the edges of the stitched rectangle using Vintage Photo Distress Ink and a Blending Tool.


Using the 4 1/2" Stitched Rectangle die, die cut the stitched rectangle out of patterned paper from the Viaggi Vintage 12x12 Patterned Paper Pack. Ink the edges of the stitched rectangle using Vintage Photo Distress Ink and a Blending Tool.


Now it's time to decorate the Hot Air Balloons. 
For the large hot air balloon, adhere the two scallop borders to the top portion of the hot air ballon. Adhere the three large pointy pieces to the top portion of the basket.


For the small hot air balloon, adhere the polka dot pennant border as well as the three stars to the top portion of the hot air ballon. Adhere the three small pointy pieces to the top portion of the basket.


Adhere the 4" patterned paper stitched rectangle to the 4 1/2" patterned paper stitched rectangle. 


Using thin 3D foam squares, adhere the 3 1/2" stitched rectangle to the 4" patterned paper stitched rectangle.


Adhere the stitched fishtail banner 1/4" from the bottom of the 3 1/2" stitched rectangle piece. You'll need to add two thin 3D foam squares to the right hand side of the stitched fishtail banner.


Using foam squares, adhere the large hot air balloon overtop of the "may all" portion of the stitched fishtail banner.


Using foam squares adhere the small hot air ballon to the left of the large hot air ballon. Part of the small hot air ballon will sit on the large hot air balloon. 


To finish off the card front, add the other blue polka dot pennant banner to the top right hand side of the card front. Adhere the heart on the right hand side of the  "May All of Your Dreams Come True" banner.


Cut a cardbase from White Soft Finish Cardstock that measures 5 3/4" x 9". Score the cardbase at 4 1/2". Adhere the cardfront to the cardbase.


Here is a close up photo as well as a photo of my finished May all of your dreams come true card.


Thanks for joining me today! I hope that I've inspired you to re-create my May all of your dreams come true card at home.

Elizabeth Craft Designs Products Used:


Other Products Used:

- Tim Holtz for Ranger Ink: Distress Ink - Vintage Photo, Tattered Rose, Fossilized Amber and Weathered Wood and Blending Tool/Foam
- Ranger Ink: Jet Black Archival Ink
- Scrapbook Adhesives by 3L: Thin/3D Foam Squares

- Katelyn


Tuesday, May 30, 2017

Seaside Happy Birthday Card

I'm back on Southern Ridge Trading Company's blog today sharing with you my beautiful Seaside Happy Birthday Card which features a variety of the summer chipboard and wood pieces. I hope my Seaside Happy Birthday Card will inspire you to want to recreate it at home.


Make sure to head over to the Southern Ridge Trading Company Blog so that you can learn all about how I created my Seaside Happy Birthday Card.

- Katelyn

Monday, May 29, 2017

Spring Window

I'm up on the Creative Scrapbooker Blog's today as a guest blogger sharing my Spring Window that features Bo Bunny, Southern Ridge Trading CompanyRanger Ink and Scrapbook Adhesives by 3L products. 


You'll want to make sure to head over to the Creative Scrapbooker Blog to read all about how I created my Spring Window, so that you can recreate it at home.

- Katelyn

Friday, May 19, 2017

Thinking of You Dragonfly Card

I'm up on the Elizabeth Craft Designs blog today sharing my Thinking of You Dragonfly Card. I've created this using a few of the new dies from ModaScrap as well as a few of the classic dies from Els van de Burgt Studio. 


You'll want to make sure your way over to Elizabeth Crafts Designs Blog to read all about how I created my Thinking of You Dragonfly Card, so that you can recreate it at home. 


- Katelyn

Thursday, May 18, 2017

Memories Wall Hanging

I'm on Southern Ridge Trading Company's blog today sharing with you a beautiful Memories Wall Hanging that features the Zen Dragonfly chipboard piece. I hope my memories wall hanging will inspire you to want to recreate it at home.


Make sure to head over to the Southern Ridge Trading Company Blog so that you can learn all about how I created my memories wall hanging.

- Katelyn
Saturday, May 6, 2017

Happy Birthday Card

Happy National Scrapbook Day! With it being National Scrapbook Day, some of us from Creative Scrapbooker Magazine's Bloggers and Design Team are participating by sharing projects with you on Creative Scrapbooker's Social Media Pages. You'll want to check out their Facebook Page, Instagram and Blog as they will be giving prizes away all day. For my project, I created a Happy Birthday card featuring products from Bo Bunny, Emerald Creek Craft Supplies, Elizabeth Craft Designs, Ranger Ink and Scrapbook Adhesives by 3L. Grab a cup of your favourite beverage and read below as I share with you how to recreate my Happy Birthday Card at home.


To start, die cut the 3" Stitched Rectangle die out of a piece of Super Stock Cardstock. Once the rectangle has been cut out, place the 2 1/4" Stitched Square die 1/2" from the top and 3/8" from the left of the stitched rectangle. Cut the stitched square out. 


Once the square has been cut out of the top portion of the rectangle. Apply Emboss It Ink to the entire surface of the rectangle. After the ink has been applied, sprinkle Burnt Copper Leaves Embossing Powder over the entire rectangle. Emboss the rectangle with the heat tool. You'll need to reapply Emboss It Ink in the areas where the powder didn't stick. Sprinkle Burnt Copper Leaves Embossing Powder over the spots that have ink on them. Emboss the spots with the heat tool. 


Cut a piece of Super Stock Cardstock that measures 7/8" x 1 1/2". Apply Jet Black Archival Ink to the Happy Birthday sentiment stamp. Stamp the Happy Birthday Sentiment onto the cut piece of Super Stock Cardstock. Using Vintage Photo Distress Ink and a Blending Tool, ink the edges of the sentiment.


From the Typewriter patterned paper, cut a piece that measures 5" x 7". Distress the edges of the patterned paper. Ink the edges of the patterned paper using Vintage Photo Distress Ink and a Blending Tool.


From the Hidden Treasures patterned paper, cut a piece that measures 6 3/4" x 4 3/4". Cut a second piece that measures 2 1/4" x 5 7/8".  Distress the edges of both pieces of patterned paper. Ink the edges of the patterned papers using Vintage Photo Distress Ink and a Blending Tool.


With the Hidden Treasures patterned paper still out, fussy cut a key a letter. Ink the edges of the fussy cut images with Vintage Photo Distress Ink and a Blending Tool.


From the Bricks patterned paper, cut a piece that measures 4 1/2" x 6 1/2". Distress the edges of the patterned paper. Ink the edges of the patterned paper using Vintage Photo Distress Ink and a Blending Tool.


From the Adventures patterned paper, cut a piece that measures 4 1/4" x 6 1/4". Distress the edges of the patterned paper. Ink the edges of the patterned paper using Vintage Photo Distress Ink and a Blending Tool. From the other side of the piece of paper, fussy cut the hot air ballon. Ink the edges of the hot air ballon using Vintage Photo Distress Ink and a Blending Tool.


From the Graphic patterned paper, fussy cut three frames. Ink the edges of the frames using Vintage Photo Distress Ink and a Blending Tool.


From the Utopia patterned paper, fussy cut two frames and the ampersand out of the frame. Ink the edges of the frames and ampersand with Vintage Photo Distress Ink and a Blending Tool. 


From the Old School patterned paper, fussy cut a telephone and two cassette tapes. Ink the edges of the telephone and tapes using Vintage Photo Distress Ink and a Blending Tool.


Now it's time to assemble your card.

Adhere the letter patterned paper to the dot patterned paper. Adhere the brick paper to the letter patterned paper. 


On the top right side of the grey/blue patterned paper, slightly tear the paper down. On the bottom left side of the grey/blue patterned paper, slightly tear the paper up. Adhere the grey/blue patterned paper to the brick patterned paper.


Adhere one frame 1/2" from the top and 1/8" from the right of the grey/blue patterned paper.


Foam square the smaller letter paper 1/4" from the top and left of the grey/blue patterned paper. Adhere the long blue frame with image, 1/4" from the top and 3/8" from the left of the letter patterned paper. 


Adhere the second frame with image in behind the embossed frame.


Add adhesive on the left hand side of the embossed frame. Add foam squares on the right hand side of the embossed frame. Adhere the embossed frame 3/4" from the top and  1/4" from the left  of the blue frame. 


On the right hand side of the embossed frame, adhere a frame, a telephone and a cassette tape.


Adhere the other cassette tape underneath the telephone cord. Adhere the Happy Birthday sentiment 1/8" from the left and 3/8" from the bottom of the embossed frame.


Adhere the small frame slightly overtop of the bottom of the frame. The small frame will slightly sit over the Happy Birthday sentiment.


Adhere the fussy cut letter overtop of the frame, showing a bit on the right hand side. Foam square the ampersand slightly over the letter.


Foam Square the hot air balloon slightly overtop of the letter and the ampersand. 


Cut a cardbase out of Super Stock Cardstock that measures 
7" x 10". Score the cardstock at 5".


Adhere your card front to the cardbase. 


Here's a closeup shot of the card front.


Here's the finished Happy Birthday Card.


Thanks for joining me today! Make sure to head over to Creative Scrapbooker's Magazine blog, Facebook Page and Instagram to check out the rest of the Bloggers and Design Team members wonderful creations. I hope that I've inspired you to re-create my Happy Birthday card at home.

Supplies Used:

- Emerald Creek Craft Supplies: Burnt Copper Leaves Embossing Powder and Happy Birthday Stamp
- Bo Bunny: Life in Color -  Utopia, Hidden Treasures, Typewriter, Adventures, Graphic and Old School
- Ranger Ink:  Jet Black Archival Ink and Emboss It Ink
- Tim Holtz for Ranger Ink: Vintage Photo Distress Ink
- Elizabeth Craft Designs: Stitched Rectangles and Stitched Squares 
- Scrapbook Adhesives By 3L: Thin Foam Squares, 3D Foam Squares, EZ Runner and Dodz
- Creative Scrapbooker/Cathie Allan: Super Stock Cardstock 

- Katelyn